Managing auto transfer rules between your Checking and Treasury accounts

Auto transfer rules help you keep your Rho Checking account funded while putting excess cash to work in your Rho Treasury account. This article explains how auto transfer rules work, how to set them up, and what to expect in less common scenarios.

What are auto transfer rules?

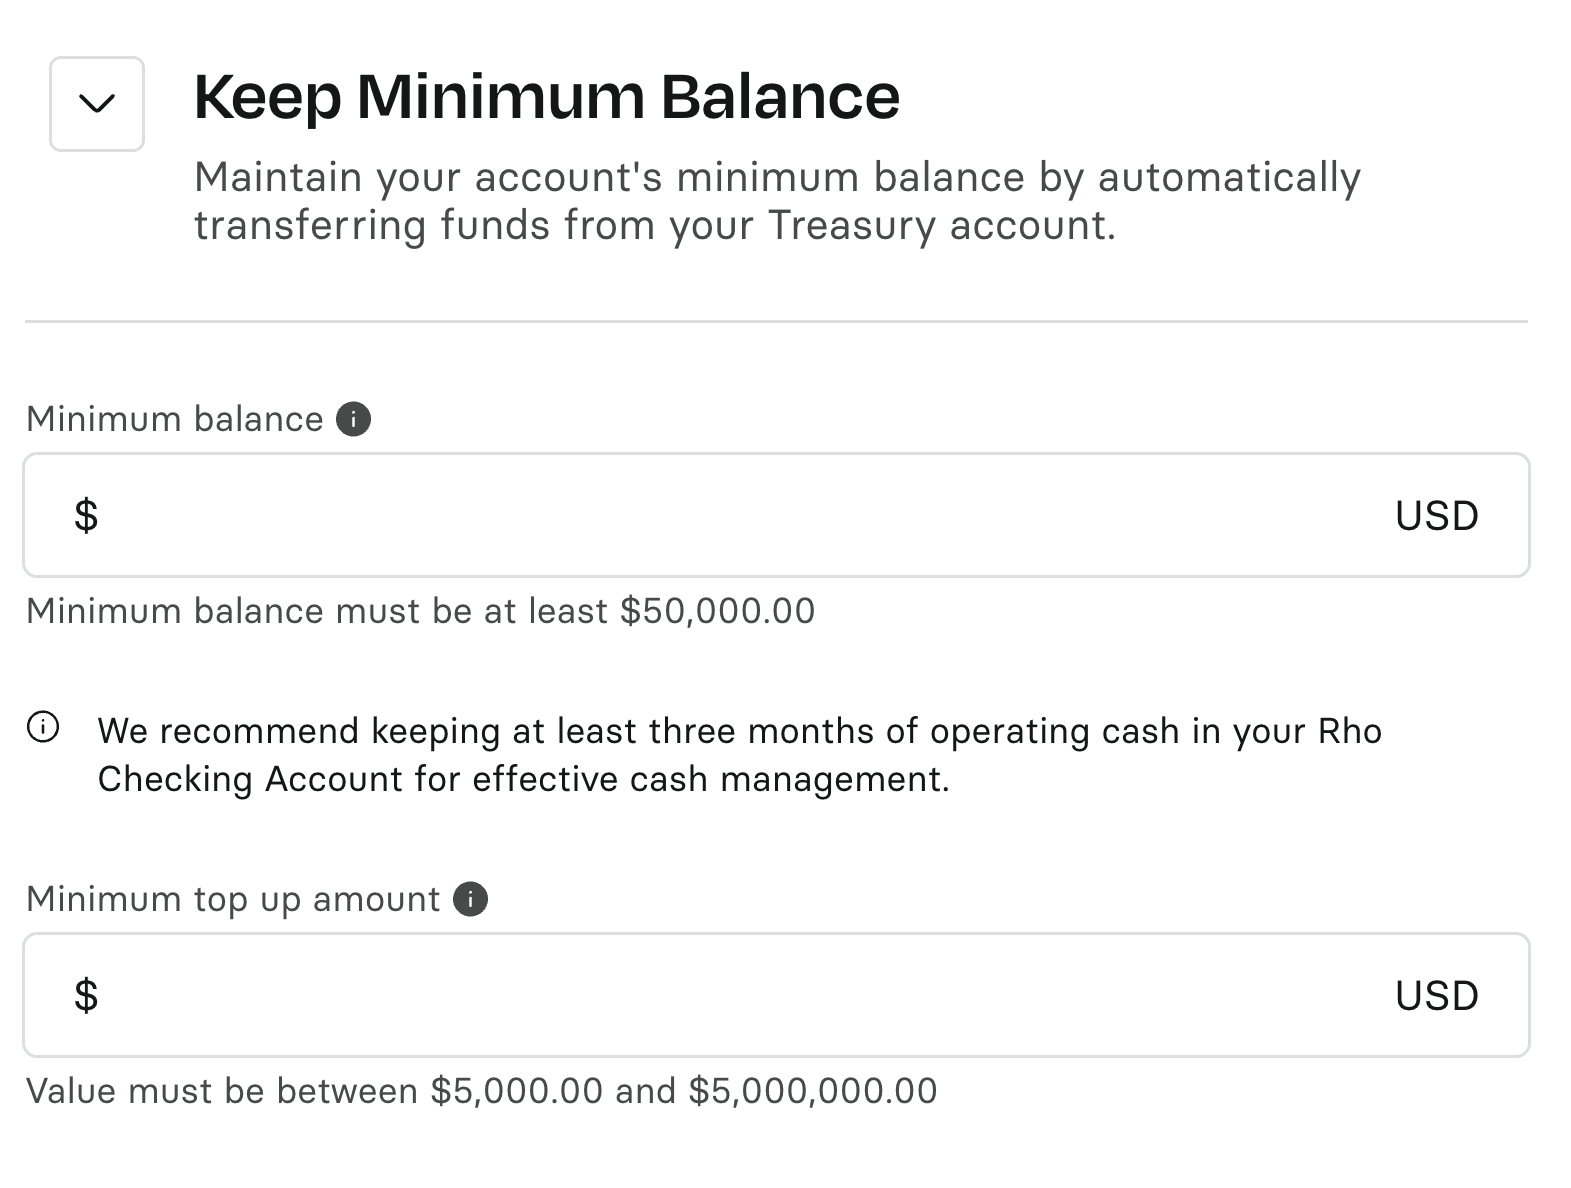
Auto transfer rules automatically move funds from your Rho Treasury account to your Rho Checking account when your available balance drops below a minimum you set.

They help you:

  • Keep enough funds in your Checking account for day-to-day operations

  • Keep excess cash working in Treasury

  • Reduce manual money movement

  • Maintain a consistent operating buffer

You can set a minimum balance for your Checking account and configure a top up amount to add an additional cushion.

How to set up an auto transfer rule

  1. Navigate to the Banking or Treasury tab in the Rho platform.

  2. Click the Setup button at the top of the page.

    • If a rule already exists, click the Manage 1 Rule button instead.

  3. Create, edit, or delete your keep minimum balance auto transfer rule.

  4. Click Create.

    • If you are updating an existing rule, click the Save & Update button instead.

Changes take effect immediately after you save them. Balances are monitored every business day at 8 a.m. ET.

How auto transfer rules work

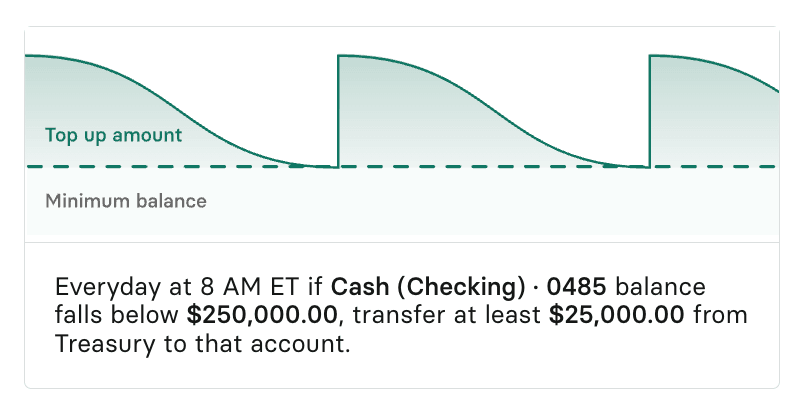
Every business day at 8 a.m. ET, Rho checks the available balance in your Checking account.

  • If your available balance is below your minimum balance, a Treasury withdrawal is initiated.

  • If your available balance is at or above your minimum balance, no transfer occurs.

Auto transfer rules run once per business day. If your balance drops below your minimum after the daily check runs, the transfer initiates on the next business day.

If a Treasury withdrawal is already pending and has not settled, the rule is skipped for that day. The system checks again at 8 a.m. ET on the next business day. This prevents duplicate transfers and keeps your cash working.

How Rho calculates your balance

Auto transfer rules use your available balance.

Your available balance is the amount of money you can use today. It excludes pending transactions.

How the minimum balance and top up amount work

If your available balance is below your minimum at 8 a.m. ET, Rho calculates the transfer amount using this formula:

  • [(minimum balance – Checking available balance) + top up amount] or

  • $5,000 (whichever is greater)

The transfer amount will:

  • Restore your Checking account to its minimum balance

  • Add your selected top up buffer

  • Meet the $5,000 minimum transfer requirement

This design reduces the frequency of sweeps and helps maintain a healthy operating balance while keeping your cash working.

Example

Let’s say:

  • Your minimum Checking account balance is $250,000

  • Your top-up amount is $25,000

  • Your available balance drops to $200,000

At 8 a.m. ET, the auto transfer rule checks your available balance and transfers $75,000 to your Checking account.

($250,000 –$200,000) + $25,000 = $75,000

Requirements

  • Minimum transfer amount: $5,000

  • Minimum Checking balance requirement: $50,000

What to know in less common scenarios

The rule did not trigger

Auto transfer rules run once per business day at 8 a.m. ET. If your balance dropped after the check ran, the transfer initiates on the next business day. Rules are skipped on market holidays and will trigger the following business day.

You have a manual Treasury withdrawal in progress

If a withdrawal from your Treasury account to your Checking account is already pending, the auto transfer rule pauses until it settles.

Your Treasury account does not have enough funds

If the required sweep amount exceeds the available funds in your Treasury account, the transfer does not execute.

Your funds are tied up in a pending purchase

If your Treasury funds are being used to purchase an asset, those funds are not available until the purchase settles. The transfer does not execute until settlement is complete.

The transfer amount is larger than expected

The transfer not only covers the shortfall but also includes your configured top-up amount, with a minimum of $5,000. This is intentional and helps reduce the frequency of transfers.

If you have questions about setting up or adjusting auto transfer rules, contact Rho Client Service at clientservice@rho.co or by calling 855-743-8746.

Popular help center articles

Most read this week.

Accounting

How to set up Rho's QuickBooks Integration

The following instructions describe how to set up a direct integration between your Rho Account and your existing QuickBooks Online account. If you're interested in connecting Rho transactions via the QuickBooks Bank Feed, see instructions here . Note: this integration is only compatible with QuickBooks Online. For QuickBooks Desktop, you can download a CSV of transactions from your Rho account via these steps and upload them to QB Desktop). Once you are signed into the Rho platform, click Integrations in the navigation bar. Click the QuickBooks icon. Follow the login instructions to connect to your QuickBooks account. When finished, click Accounting in the navigation bar. Select the transactions you want to sync. Click the Sync button. When you connect Quick Books to Rho, a new account is added to your CHART OF ACCOUNTS tab named RHO [Checking Acct#] , where [Checking Acct#] is the 10-digit account number associated with the linked Rho account. This is your primary account and is required for automatic account reconciliation. You can rename this account, but integration between your Rho account and Quickbooks will not work if the account is deleted. What information can I view in the Accounting Tab? Once you have connected QuickBooks to Rho, use the Accounting Tab in the Rho platform to manage mapping rules, view transactions, and make necessary changes. The Accounting Tab includes two subsections Dashboard and Mapping Rules. Learn more about what you can view in the Dashboard here and about what you see in the Mapping Rules here. Important Integration Notes Syncing with your QuickBooks account is a manual process. Each time you want to reconcile your Rho Account in QuickBooks, you must click the Sync button. However, you can set up automatic recurring syncs by going to the settings tab within your accounting workflow and setting a recurring sync.

General Rho Information

How Do I Contact Support?

Reach out to our dedicated Rho specialists anytime over the phone at 1 (855) 7-GETRHO, through email at clientservice@rho.co, or start a live chat by logging into your Rho account (web or app), clicking the Help button in the lower left, and selecting 24/7 live support.

Cards

How to Add Your Rho Card to your Digital Wallet

Your virtual & physical Rho cards can now be added to your Apple or Google Wallet for a quick, contactless, and secure way to pay. Note: Currently, we don't support adding Rho cards to WeChat. Set up is simple - follow the steps below to get started: Apple Wallet Go to your Wallet app and click the + button in the right-hand corner. Select the Card Type “Credit”. Hold your Rho physical card's chip near your device or place it directly on the screen. For a virtual card, choose the “Enter Card Details Manually” option to add your card. Verify your card details are correct and enter your 3-digit CVV security code. You should notice the "Card Added" confirmation after a few moments. For your added security, you may be asked to verify your Rho Card account via two-factor authentication by “Text Message”, “Email”, or "Authenticator App", if you have set it up. A six-digit code will be sent to your email address, phone number on file, or the Authenticator App, enter your code in the field provided. Your Rho Card is now active in your Apple Wallet and ready to use at contactless point-of-sale terminals that support Apple Pay. For more information, see Apple’s support document . How to use your Rho Card in Apple Pay at a contactless point-of-sale terminal Select your Rho Card via the Apple Wallet app. Double-click the right-hand button on the side of your iPhone when a near contactless point-of-sale terminal. Verify your identity using Face ID or your Passcode. You will now be prompted to hold your phone near the contactless reader. Hold near the reader until the purchase has been completed. Google Wallet Your virtual & physical Rho cards can now be added to your Google Wallet on your Android device for a quick, contactless, and secure way to pay. Set up is simple - follow the steps below to get started: Open your Google Pay (GPay) app on your Android device and click the image of a card in the right-hand corner. This will open a screen that shows you all the cards you have linked to your wallet. Select “Add a Card” at the bottom of the screen. Select the Payment Method “Credit or debit card.” Take a picture of your Rho physical card or the virtual card in your Rho dashboard. Your phone will recognize your card details and then you must enter your 3-digit CVV security code. Alternatively, you may enter your card details manually. Make sure your address, ZIP code, and phone number match your settings in your Rho account. The address should be your organization’s billing address. Press Save. Review Rho’s Terms & Conditions and click “Accept & continue.” For your added security, you may be asked to verify your Rho Card account via two-factor authentication by “Text Message” or “Email.” After you receive your six-digit verification code by text or email, enter it and click Submit. Your Rho Card is now active in your Wallet and ready to use at contactless point-of-sale terminals that support Google Pay. For more information visit the Google Pay Help Center

Mobile App

How to Upload a Receipt in the Mobile App

You can add receipts to all Rho Card transactions within the app ( in addition to desktop, email, and SMS uploads ). To add a receipt, open the Rho app and tap on the transaction requiring a receipt. In the Attachments section, click "Upload Receipt" and choose one of the following options: Select an image from your camera roll Take a photo of your receipt using your camera Select and upload a file Note: Be sure to include any applicable tip amount on your receipt. In the transaction details window, you can also add departments, labels, and notes to your transaction.