
Understanding the Rho Slack App

The Rho Slack App brings your Rho account into Slack: check balances, review recent transactions, get alerts when money moves, and ask questions about your finances without leaving your workspace.

How access works

Two separate things connect your team to Rho, and knowing the difference explains most of what you will see:

  • The workspace connection. A Rho Admin links your Slack workspace to your Rho business, once. One workspace connects to one Rho business

  • Sign in with Rho. Each person ties their own Slack identity to their own Rho account with a personal sign-in link. This is per-person and sits on top of the workspace connection

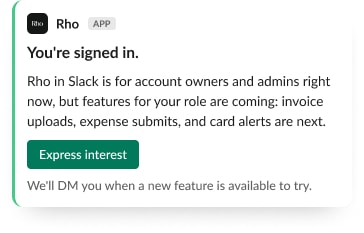
Once both are in place, what you see in Slack follows your role in Rho. The Rho Slack App is available to Account Owners and Admins today, with support for more roles on the way. Teammates in other roles can sign in and express interest, and we will let them know when features for their role arrive.
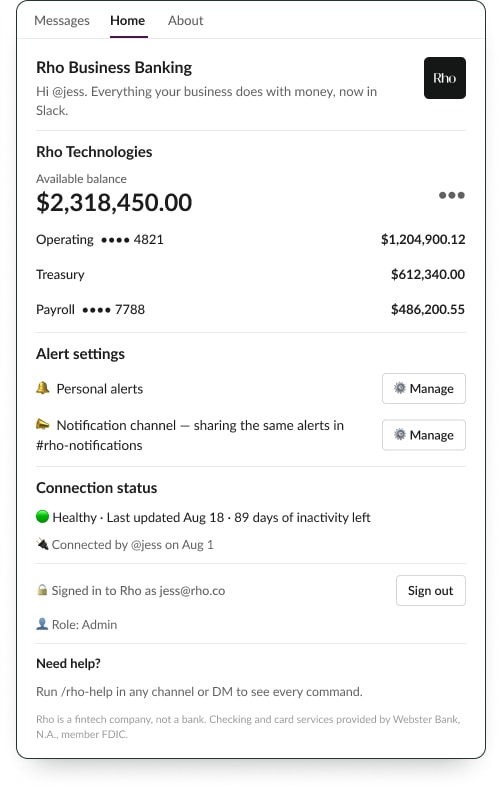
What you can do

  • See balances and account details on the app's Home tab, or with /rho-accounts

  • Review recent transactions with /rho-transactions

  • Get alerts as DMs or in a private channel: daily balances, transaction activity, and card spend

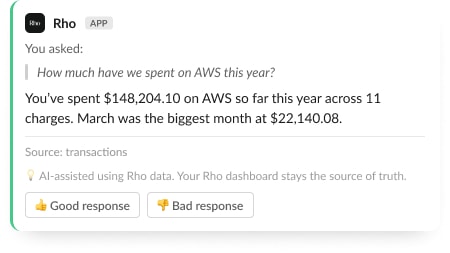
  • (Beta): Ask questions in plain language, like "How much have we spent on AWS this year? 
Built for privacy

The Rho Slack App treats your financial data carefully by design:

  • Private channels and DMs only. The app does not operate in public channels. If it is invited to one, it says so and removes itself

  • Read-only connection. The workspace connection can view balances, transactions, and statements. It cannot move money or change anything in Rho

  • Personal links. Every sign-in and connect link works only for the person it was sent to

  • Your access, not your neighbor's. Command replies are visible only to you, and answers to questions asked in a channel arrive by DM
Popular help center articles

Most read this week.

Accounting

How to set up Rho's QuickBooks Integration

The following instructions describe how to set up a direct integration between your Rho Account and your existing QuickBooks Online account. If you're interested in connecting Rho transactions via the QuickBooks Bank Feed, see instructions here . Note: this integration is only compatible with QuickBooks Online. For QuickBooks Desktop, you can download a CSV of transactions from your Rho account via these steps and upload them to QB Desktop). Once you are signed into the Rho platform, click Integrations in the navigation bar. Click the QuickBooks icon. Follow the login instructions to connect to your QuickBooks account. When finished, click Accounting in the navigation bar. Select the transactions you want to sync. Click the Sync button. When you connect QuickBooks to Rho, a new account is added to your CHART OF ACCOUNTS tab named RHO [Checking Acct#] , where [Checking Acct#] is the 10-digit account number associated with the linked Rho account. This is your primary account and is required for automatic account reconciliation. You can rename this account, but integration between your Rho account and QuickBooks will not work if the account is deleted. What information can I view in the Accounting Tab? Once you have connected QuickBooks to Rho, use the Accounting Tab in the Rho platform to manage mapping rules, view transactions, and make necessary changes. The Accounting Tab includes two subsections Dashboard and Mapping Rules. Learn more about what you can view in the Dashboard here and about what you see in the Mapping Rules here. Important Integration Notes Syncing with your QuickBooks account is a manual process. Each time you want to reconcile your Rho Account in QuickBooks, you must click the Sync button. However, you can set up automatic recurring syncs by going to the settings tab within your accounting workflow and setting a recurring sync.

General Rho Information

How Do I Contact Support?

When you contact Rho support, you reach a real human — 24/7, on every account, at no cost. No phone trees, no paywalled support tiers. Phone: 1 (855) 743-8746 — that's 1-855-7-GETRHO Email: clientservice@rho.co Live chat: log in to Rho (web or mobile app), click Help in the lower left, and select 24/7 live support Every channel is staffed around the clock, every day of the year.

Cards

How to Add Your Rho Card to your Digital Wallet

Your virtual & physical Rho cards can now be added to your Apple or Google Wallet for a quick, contactless, and secure way to pay. Note: Currently, we don't support adding Rho cards to WeChat. Set up is simple - follow the steps below to get started: Apple Wallet Go to your Wallet app and click the + button in the right-hand corner. Select the Card Type “Credit”. Hold your Rho physical card's chip near your device or place it directly on the screen. For a virtual card, choose the “Enter Card Details Manually” option to add your card. Verify your card details are correct and enter your 3-digit CVV security code. You should notice the "Card Added" confirmation after a few moments. For your added security, you may be asked to verify your Rho Card account via two-factor authentication by “Text Message”, “Email”, or "Authenticator App", if you have set it up. A six-digit code will be sent to your email address, phone number on file, or the Authenticator App, enter your code in the field provided. Your Rho Card is now active in your Apple Wallet and ready to use at contactless point-of-sale terminals that support Apple Pay. For more information, see Apple’s support document . How to use your Rho Card in Apple Pay at a contactless point-of-sale terminal Select your Rho Card via the Apple Wallet app. Double-click the right-hand button on the side of your iPhone when near a contactless point-of-sale terminal. Verify your identity using Face ID or your Passcode. You will now be prompted to hold your phone near the contactless reader. Hold near the reader until the purchase has been completed. Google Wallet Your virtual & physical Rho cards can now be added to your Google Wallet on your Android device for a quick, contactless, and secure way to pay. Set up is simple - follow the steps below to get started: Open your Google Pay (GPay) app on your Android device and click the image of a card in the right-hand corner. This will open a screen that shows you all the cards you have linked to your wallet. Select “Add a Card” at the bottom of the screen. Select the Payment Method “Credit or debit card.” Take a picture of your Rho physical card or the virtual card in your Rho dashboard. Your phone will recognize your card details and then you must enter your 3-digit CVV security code. Alternatively, you may enter your card details manually. Make sure your address, ZIP code, and phone number match your settings in your Rho account. The address should be your organization’s billing address. Press Save. Review Rho’s Terms & Conditions and click “Accept & continue.” For your added security, you may be asked to verify your Rho Card account via two-factor authentication by “Text Message” or “Email.” After you receive your six-digit verification code by text or email, enter it and click Submit. Your Rho Card is now active in your Wallet and ready to use at contactless point-of-sale terminals that support Google Pay. For more information visit the Google Pay Help Center

Mobile App

How to Upload a Receipt in the Mobile App

You can add receipts to all Rho Card transactions within the app ( in addition to desktop, email, and SMS uploads ). To add a receipt, open the Rho app and tap on the transaction requiring a receipt. In the Attachments section, click "Upload Receipt" and choose one of the following options: Select an image from your camera roll Take a photo of your receipt using your camera Select and upload a file Note: Be sure to include any applicable tip amount on your receipt. In the transaction details window, you can also add departments, labels, and notes to your transaction.